4 Creating Records

Chapter Leads: Lise DeShea & Thomas Wilson
4.1 What is a record?
Creating records is analogous to taking out a copy of a form and starting to fill it out. In REDCap, forms (also called instruments) are nested within projects. A record is all the information in REDCap about one entity, like one participant in a study or one person who completed a survey. Someone filling out an online survey that was created in REDCap would create a record by completing the survey. You might create a record while testing a project while the project is being developed. Or you might create a record after the project has been put into production and data collection has begun for a study or investigation.
This chapter will show screenshots from a REDCap project that was created for the purpose of letting data entry people practice. It is an exact copy of another REDCap project that was used by people entering data from a multi-site randomized controlled trial. The screenshots will not show any protected health information (PHI); all information you may see is pretend data made up by the people learning how to use the practice REDCap project. After they had practiced, their access to the practice project was turned off, and they were allowed access to the study’s actual REDCap for entering patient data.
4.2 Creating a record
After you have opened a REDCap project, you will see several links on the left side of the screen. One of them is labeled Add/Edit Records:

Clicking the Add/Edit Records link typically opens a screen where the new record is created. This screen also assigns a unique identifying number to each record. Look for a green button labeled Add new record:

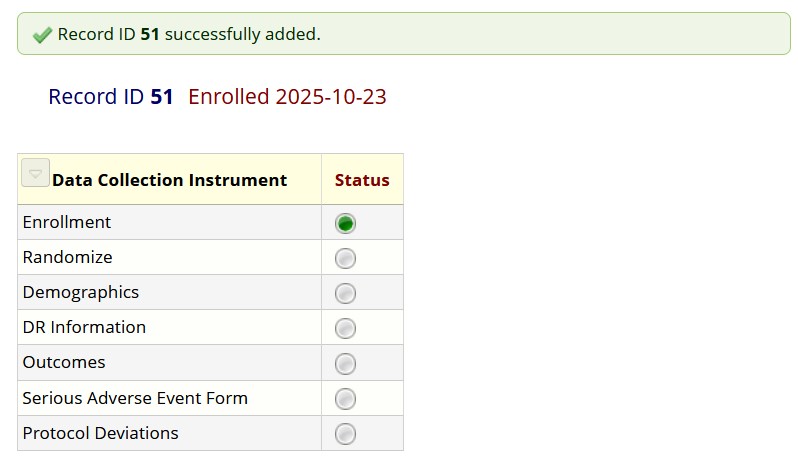
After clicking that button, we see the Record Home Page for the new record:
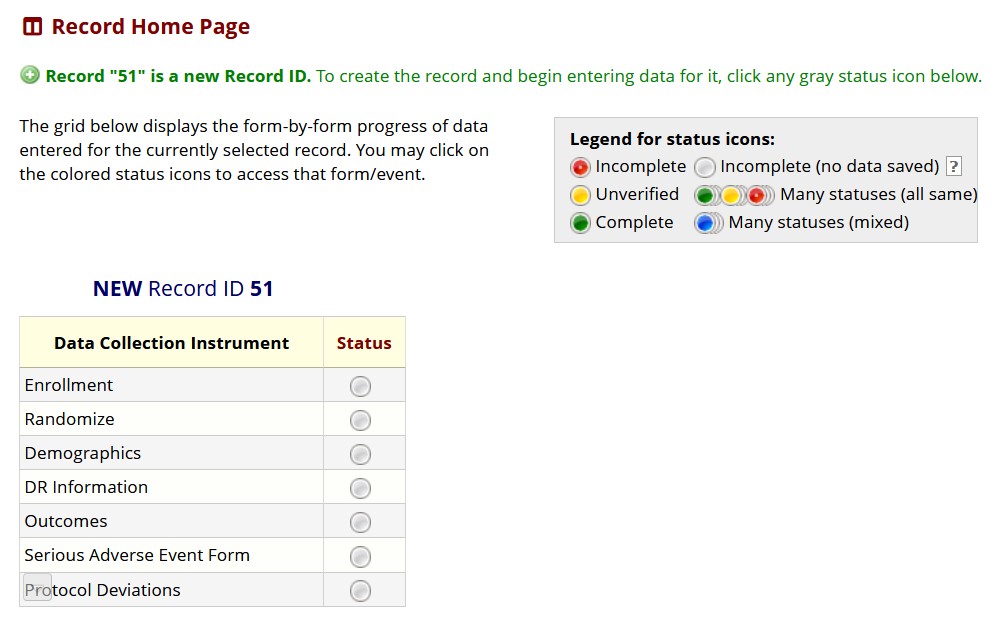
This page summarizes the status of the forms for Record ID 51. We see a list of 7 instruments. The gray circles to the right of each instrument is a link to that instrument. Notice the Legend for status icons box. It shows different colors of circles. A gray circle means the form has no data saved in it.
4.3 Entering a record
The Record Home Page is like a folder in which a clinic would keep all the forms for a given patient – except everything is blank, and all we have is a patient number (Record ID 51). We have created a record, but we need to go into each instrument to enter data. When we click on the gray dot next to the first instrument under Data Collection Instrument, we are taken to the Enrollment form for this project.
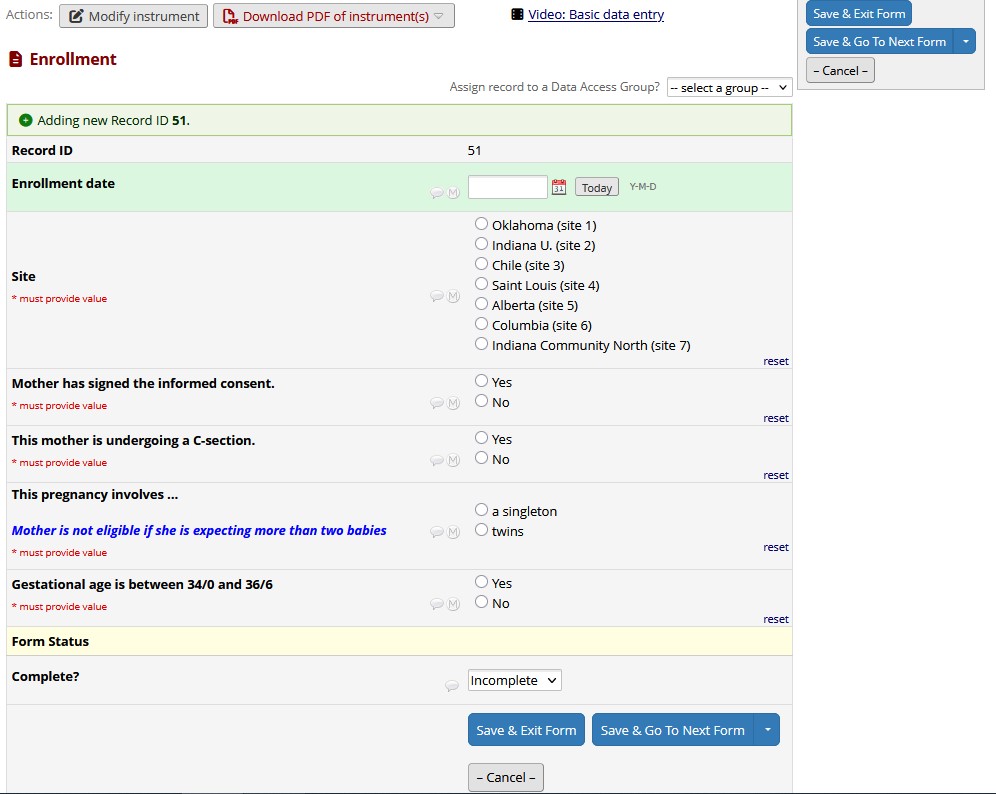
After filling out the form for the 51st mother in this study, we come to the Form Status section:
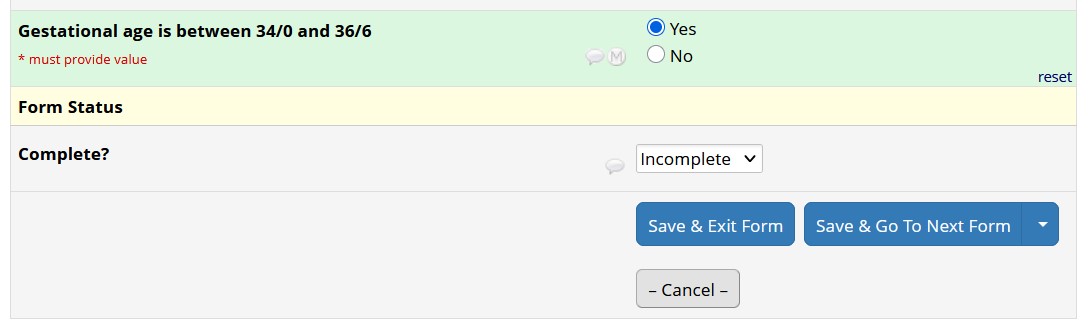
This field has a drop-down menu. By clicking on the downward-pointing arrowhead next to the Incomplete, we see the menu of options:
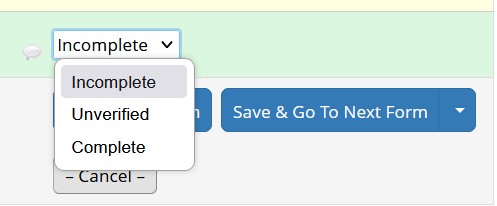
If all the information has been included in this form, you will select Complete. The Incomplete option is good for situations where the form has fields for information that has to be entered later. Unverified can be used for special situations in a study, such as an investigator needing to check a data entry person’s interpretation of an X-ray. Whatever status you choose will determine which color of button will be shown on the Record Status Dashboard. For this example, we will select Complete and click the blue button for Save & Exit Form. REDCap next will return you to the Record Home Page.
Now the button next to Enrollment is green, which the Legend for status icons tells us is Complete. We can repeat this process for each of the other forms. In fact, we can go from saving one form directly into the next form.
4.4 Navigate from one record to another
By clicking the green button next to Enrollment, we go back into Record ID 51’s Enrollment form. At the bottom of the page, the blue button labeled Save & Go To Next Form has a drop-down menu with three options:
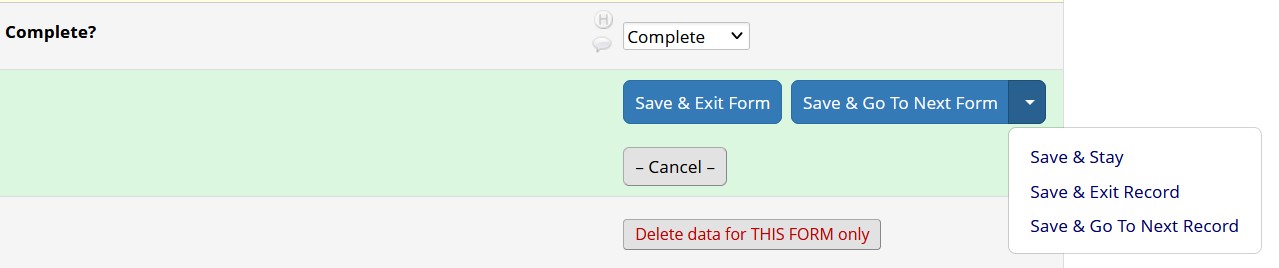
Save & Stay stores the entered data but leaves the form open on your screen. Save & Exit Record does the same thing as the blue Save & Exit button: it returns us to the Record Home Page. Save & Go To Next Record would take us to Record 52, if it existed in this project. Clicking on the blue Save & Go To Next Form button keeps us in Record 51 and opens the next instrument in the project.
4.5 Repeating instances of a form
Sometimes forms are set up as repeating instruments, meaning it can be completed more than one for the same person. In this practice project, the study allowed twins to be enrolled. The initial Enrollment form pertained to the mother, but the DR (Delivery Room) Information form is a repeating instrument, which the data entry person completes once for each twin. After all, the twins will have different birth weights and may receive different kinds of respiratory support.
Let’s look at a list of the records already created for this project. We will click the Record Status Dashboard link on the left side of the page, shown in the first screenshot in this chapter. This dashboard shows different forms with different statuses, and to the right of some of the circles, there is a plus sign in a little gray box. We have drawn a box around three of these plus signs.
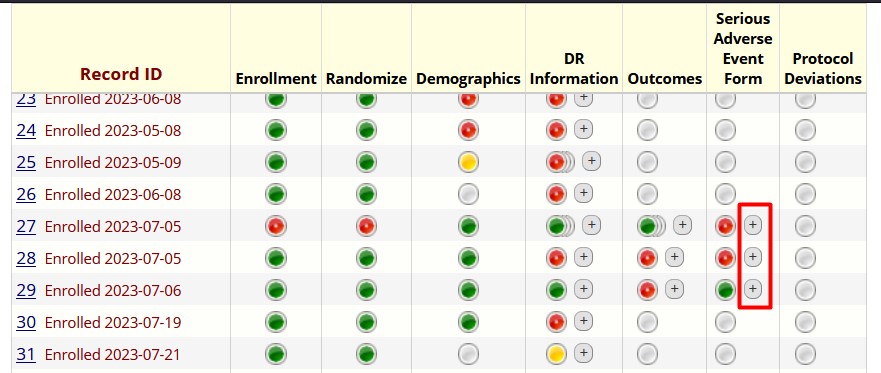
The plus sign is a link to create another instance (copy) of that form. We might want to do that if the form has been filled out for one twin and we were ready to complete the instrument for the other twin.
4.6 Other ways to add records
New records can be created at least two other ways. The Record Status Dashboard has a green button labeled Add new record. That is another avenue for creating a record.
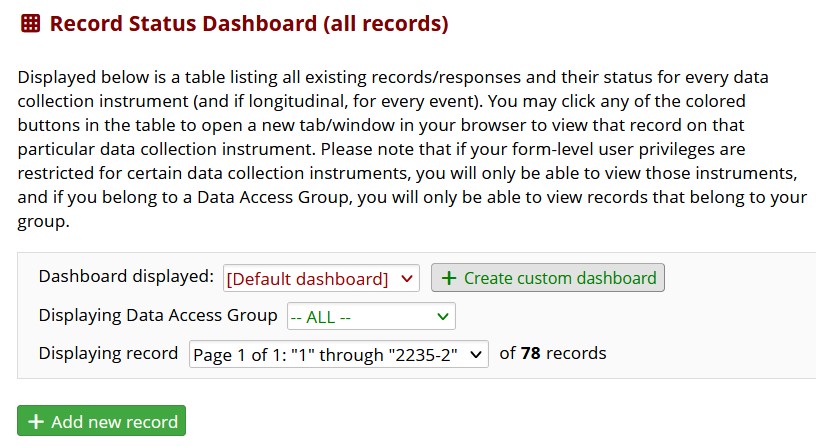
A new record also can be created when someone completes a REDCap survey. Those records would appear under the Record Status Dashboard. Our example project does not involve surveys.
This chapter was last edited in October 2025. If you have suggested modifications or additions, please see How to Contribute on the book’s welcome page.